XAMPP is a free and open-source web server solution that allows developers to create and test web applications on their local computer. It includes the Apache web server, MySQL database, and PHP scripting language, along with other useful tools like phpMyAdmin and FileZilla. In this guide, we will explain how to install XAMPP on a Windows PC.
Step 1: Download XAMPP
The first step is to download XAMPP from the official website. Go to the XAMPP website (https://www.apachefriends.org/download.html) and click on the “Download” button for the Windows version. You will be presented with a list of available XAMPP versions for Windows, including both 32-bit and 64-bit versions. Choose the appropriate version based on your operating system.
Step 2: Run the Installer
Once you have downloaded the XAMPP installer, run the executable file to start the installation process. A dialog box will appear asking you to choose the language for the installation process. Choose your preferred language and click on the “OK” button.
Next, the XAMPP Setup Wizard will appear. Click on the “Next” button to proceed with the installation. You will be presented with a list of components that you can choose to install. By default, all components are selected, but you can deselect any component that you don’t need. Click on the “Next” button to continue.
You will be asked to choose the installation directory for XAMPP. By default, XAMPP is installed in the “C:\xampp” directory, but you can choose a different directory if you prefer. Click on the “Next” button to continue.
Next, you will be asked to choose the language for the XAMPP Control Panel. Choose your preferred language and click on the “Next” button.
You will be presented with a summary of the installation settings. Review the settings and click on the “Next” button to begin the installation process.
Step 3: Launch XAMPP Control Panel
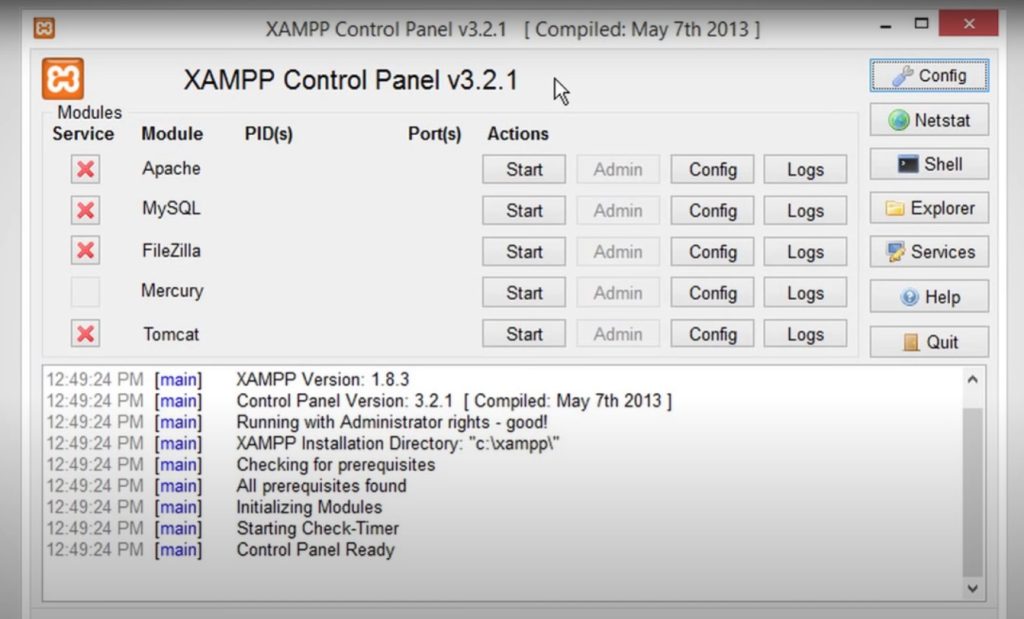
Once the installation is complete, you can launch the XAMPP Control Panel. The Control Panel is used to start and stop the Apache web server, MySQL database, and other XAMPP components.
To launch the Control Panel, go to the XAMPP installation directory (by default, “C:\xampp”) and double-click on the “xampp-control.exe” file. This will launch the XAMPP Control Panel.
Step 4: Start Apache and MySQL
In the XAMPP Control Panel, you will see a list of available components, including Apache and MySQL. To start Apache and MySQL, click on the “Start” button next to each component. The button will change to “Stop” once the component is running.
You should see the status of each component change to “Running” in the XAMPP Control Panel. Once Apache and MySQL are running, you can open a web browser and go to the address “http://localhost” to verify that the Apache web server is running.
Step 5: Test PHP
To test that PHP is working correctly, create a new file called “test.php” in the “C:\xampp\htdocs” directory. Open the file in a text editor and add the following code:
<?php
phpinfo();
?>
Save the file and open a web browser. Go to the address “http://localhost/test.php“. You should see a page with detailed information about your PHP installation.
Step 6: Install Additional Components
XAMPP includes several additional components that you can install if needed. To install additional components, go to the XAMPP Control Panel and click on the “Shell” button. This will open a command prompt window where you can run commands to install additional components.
For example, to install the PHP Extension and Application Repository (PEAR), type the following command in the command prompt window:
pear install DBThis will install the DB package for PEAR, which provides a simple database abstraction layer for PHP.
You can also install other components using the XAMPP Control Panel. Click on the “Explorer” button to open the XAMPP installation directory in Windows Explorer. From here, you can navigate to the “xampp\php” directory and run the “php.exe” executable file to access the PHP command line interface (CLI).
You can use the PHP CLI to install additional PHP extensions or configure PHP settings. For example, to install the APC cache extension for PHP, you can run the following command in the PHP CLI:
pecl install apcThis will download and install the APC extension for PHP.
Step 7: Configure XAMPP
XAMPP includes several configuration files that you can use to customize the behavior of the Apache web server, MySQL database, and other components. These files are located in the “xampp\apache\conf” and “xampp\mysql\bin” directories.
For example, you can edit the “httpd.conf” file in the “xampp\apache\conf” directory to change the default port for the Apache web server. By default, Apache listens on port 80, but you can change this to a different port if needed.
You can also configure the MySQL database by editing the “my.ini” file in the “xampp\mysql\bin” directory. This file contains settings for the MySQL server, such as the maximum allowed packet size and the default storage engine.
Step 8: Use XAMPP for Web Development
Once XAMPP is installed and configured, you can use it to develop and test web applications on your local computer. You can create new PHP scripts or HTML files in the “C:\xampp\htdocs” directory and access them using a web browser.
XAMPP also includes several useful tools for web development, such as phpMyAdmin for managing MySQL databases and FileZilla for transferring files to and from the web server.
Conclusion
In this guide, we have explained how to install XAMPP on a Windows PC. XAMPP is a powerful tool for web development that includes the Apache web server, MySQL database, and PHP scripting language, along with other useful tools. By following these steps, you can easily set up XAMPP on your local computer and start developing web applications.
Video Tutorial
Leave a Reply